Fixing a Leaky Faucet: A Step-by-Step Guide
A dripping faucet is not only an annoyance but also a source of water waste that can increase utility bills. Fortunately, many common causes of leaks are straightforward to address with basic tools and a little patience. This guide aims to provide a clear process for diagnosing and repairing a leaky faucet, focusing on the replacement of washers and O-rings, which are frequent culprits. Whether you own a modern mixer tap or a traditional pillar tap, understanding the underlying mechanics will help you tackle the job with confidence.
The approach outlined here is based on standard practices and is intended for informational purposes. HomeSmart Solutions encourages homeowners to assess their own skill level and, if in doubt, consult a professional plumber, especially when dealing with complex fixtures or persistent issues. Each situation can differ based on the age of the faucet and its specific design, so a methodical approach is essential. The following steps offer a structured method to identify the source of the leak and perform the necessary replacements.
Understanding Your Faucet Type
Faucets come in various designs, and the repair process depends largely on the type you have. The most common types are compression faucets, which have separate hot and cold handles, and mixer faucets, which have a single handle that controls both temperature and flow. Compression faucets are often found in older homes and are relatively easy to repair because they use washers that can wear out. Mixer faucets, on the other hand, may use cartridges or ceramic discs, but many still rely on O-rings and seals that can fail.
Before beginning any repair, it is important to identify the type of faucet you have. Look at the number of handles: if there are two, it is likely a compression faucet. If there is one handle, it could be a ball, cartridge, or disc type. For the purpose of this guide, we will focus on the replacement of washers and O-rings, which are common to many types, particularly compression and some cartridges. Even if your faucet uses a different mechanism, the principles of shutting off the water and disassembling the handle are similar, providing a foundation for further troubleshooting.
Additionally, consider the age of the faucet. Older fixtures may have worn out more than just the washer, and it is wise to inspect all parts while you have them apart. Some kits contain a variety of washers and O-rings, but matching the exact size and type is crucial. If you are unsure, take the old parts to a hardware store for comparison. This step can save time and prevent repeated leaks.
Essential Tools and Materials
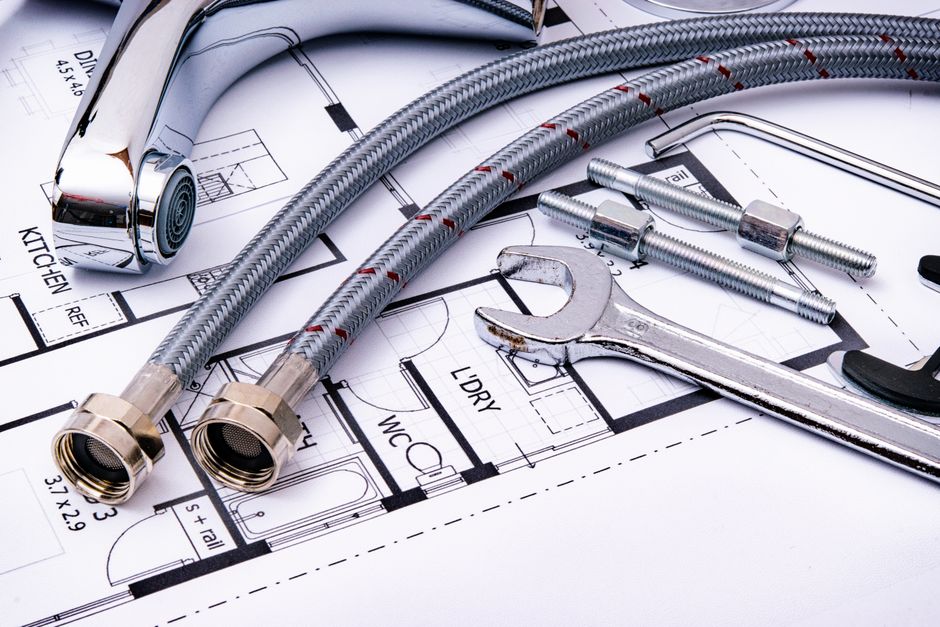
To replace washers and O-rings, you will need a few basic tools that are commonly found in most households. A set of adjustable wrenches, screwdrivers (both flat-head and Phillips), and a pair of pliers are essential. You may also need a utility knife to remove old O-rings and a small brush for cleaning. Penetrating oil can be helpful if parts are stuck. Additionally, it is advisable to have a cloth or towel to clean up any residual water and to protect the sink surface.
Materials include replacement washers and O-rings of the correct size. These are inexpensive and available at most DIY stores. It is a good idea to buy a comprehensive kit that includes various sizes, as this allows you to have spares for future repairs. Silicone grease or plumber’s grease is also recommended to lubricate new O-rings, which helps them seat properly and extend their lifespan. When selecting O-rings, ensure they are made of a durable rubber or silicone suitable for water systems.
Prepare your workspace by laying out all tools and materials within reach. Turn on the faucet to deplete any residual water in the pipes, and place a bucket or container under the faucet to catch any drips during disassembly. Ensure good lighting and, if possible, close the drain to prevent small parts from falling in. Having a systematic approach will make the repair process smoother and reduce the likelihood of losing components.
Shutting Off the Water Supply
Before any disassembly, it is crucial to shut off the water supply to the faucet. Most sinks have isolation valves located beneath the basin that control the hot and cold water individually. Turn these valves clockwise until they are fully closed. If your setup lacks valves, you may need to shut off the main water supply for the property. After turning off the valves, open the faucet to release any remaining water pressure and drain the lines. This prevents water from spraying out when you disassemble the faucet.
Some faucets may have residual water in the spout or handle, so be prepared with a cloth to absorb any drips. Once the faucet is dry, you can proceed. It is also a good time to check for any other issues, such as low water pressure, which might indicate a separate problem. However, the focus here is on the leak, so continue with the repair.
If you have a mixer tap, the shut-off valves may be located just below the tap on the wall or under the sink. In some cases, there may be a single valve that controls both supply lines. Ensure that the water is completely off before moving on. Safety is a priority; never attempt to disassemble a faucet while the water is still flowing.
After the water is off, open the faucet to verify that no more water comes out. This confirms that the supply is effectively cut off. If water continues to flow, the valves may be faulty, and you may need to shut off the main water supply. Once confirmed, you can proceed with disassembly.
Disassembling the Faucet
The disassembly process varies slightly depending on the faucet type. For a compression faucet, usually there is a decorative cap on the handle that hides a screw. Pry off the cap with a flat-head screwdriver and remove the screw. Lift the handle straight up to expose the valve stem. There may be a packing nut that needs to be loosened with an adjustable wrench. Carefully remove the nut and the valve stem, taking note of the order of parts as you go.
For mixer taps, the handle may be secured with a screw in the center or a grub screw on the side. Remove the handle to access the cartridge or valve assembly. Some cartridges are held in place with a retaining nut that can be unscrewed with a wrench. Once the cartridge is out, you can inspect the O-rings and seals.
Throughout the process, use penetrating oil if any components are stuck, as forcing them can cause damage. Place all parts in a tray or on a cloth to keep them organized. It is helpful to take pictures with a phone to remember the correct order of reassembly. Once the valve stem or cartridge is removed, inspect it for wear and note the location of the washers and O-rings.
Be gentle with the parts, especially if they are plastic. Avoid over tightening when reassembling, as this can strip threads. Also, pay attention to the orientation of the washers; some are designed to fit at a specific angle. If you are unsure, consult the manufacturer’s instructions or seek advice from a professional.
Replacing Washers and O-Rings
Once you have access to the washer and O-ring, remove them using a flat-head screwdriver or a pick. Some washers are located at the base of the valve stem, while others are inside the faucet body. O-rings are often found around the stem or in grooves. Remove the old parts and inspect them for signs of wear, such as cracks, flattening, or deformation. This helps confirm that they were the cause of the leak.
Clean the areas where the washers and O-rings were seated. Use a cloth or a small brush to remove any debris or mineral buildup. Lubricate the new O-rings with silicone grease before installation. This not only helps them slide into place but also ensures a proper seal. Place the new washer into the correct position, making sure it fits snugly. For O-rings, stretch them carefully over the stem and into their grooves, taking care not to tear them.
If your faucet uses a compression washer that is attached with a small screw, remove the screw and replace the washer. Reuse the screw if it is in good condition; otherwise, replace it with a new one from the kit. Tighten it enough to hold the washer in place but avoid overdoing it. For mixer taps, the O-rings may be on the cartridge or body. Replace them with the correct size, ensuring they are properly seated.
After replacing the washers, it is a good opportunity to check other parts for wear, such as the valve seat. If the seat is corroded, it may need to be resurfaced or replaced, but that is beyond the scope of this guide. For now, focus on the washers and O-rings. Once all new parts are in place, you can begin reassembly.
Reassembling and Testing
Reassembly is essentially the reverse of disassembly. Begin by placing the valve stem or cartridge back into the faucet body. Tighten the packing nut or retaining nut with an adjustable wrench, but do not overdo it—snug is sufficient to prevent leaks. Reattach the handle and secure it with the screw. For handles that are secured with a cap, replace the cap after the screw is tightened.
After the faucet is fully reassembled, turn the isolation valves back on by rotating them counterclockwise. Do this slowly to allow air to escape. Once the valves are open, turn on the faucet gradually to check for leaks. Initially, you may see some water from the spout, which is normal. After a few seconds, inspect around the handle and the base of the spout for any dripping. If you notice a leak, shut off the water again and check that the washers and O-rings are seated correctly.
If the faucet no longer drips, you have successfully completed the repair. However, it is possible that the leak may persist if the problem was not solely due to the washers or O-rings. In such cases, other components such as the valve seat or cartridge may need attention. Consider consulting a plumber if the issue remains unresolved, as continued DIY attempts might lead to more damage.
To ensure the longevity of the repair, wipe down the faucet and remove any residual grease or water. Some faucets require periodic maintenance, and it is advisable to re-lubricate O-rings every few years. By keeping an eye on potential drips and addressing them early, you can prevent more significant problems. This process not only saves water but also extends the life of your fixture.